Composting can be carefully measured and managed, but it does not have to be. For most homes, success means keeping food scraps out of the trash and producing a stable material that smells earthy and improves soil. You can reach that goal with a few reliable habits.
This guide gives you the numbers behind those habits, because numbers are what let you diagnose your own pile instead of guessing. It also covers two failure modes that most home composting advice skips entirely: contaminated feedstock that will damage your vegetables no matter how well you compost it, and the gap between what a home pile does and what people assume it does.
Choose a system you will use
An open pile is inexpensive and easy to turn but may look untidy and attract animals if food is exposed. A ventilated bin is neater and conserves moisture, though access can be awkward. A worm bin handles food scraps indoors, year-round, if you can hold it in the right temperature range. Bokashi buckets ferment material that no other home system will take.
Tumblers deserve a specific note, because their marketing promises speed they cannot deliver. Most consumer tumblers hold well under a cubic yard, which is below the mass a pile needs to hold its own heat, and the rotation that aerates the drum also vents moisture. A tumbler behaves like a small passive system that you turn frequently. That is a fine thing to own — it is tidy, rodent-resistant, and requires no digging — but buy it for containment and convenience, not for a two-week turnaround.
Place outdoor compost on level, well-drained ground where you can reach it in bad weather. Partial shade reduces summer drying. Keep enough room to add material, turn or mix it, and harvest finished compost.
Think in greens and browns
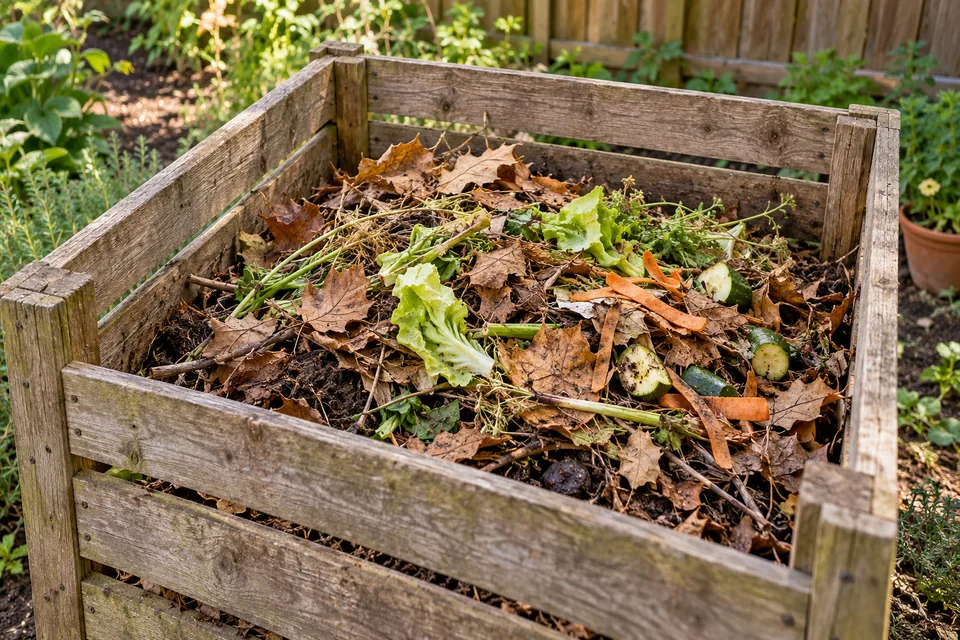
“Greens” are relatively rich in nitrogen and moisture: fruit and vegetable scraps, coffee grounds, fresh grass, and young weeds. “Browns” are relatively rich in carbon: dry leaves, shredded plain cardboard, straw, and small woody pieces. The labels describe chemistry, not literal color.
The chemistry behind the labels is the carbon-to-nitrogen ratio. Composting microbes work best on a diet of roughly 30 parts carbon to 1 part nitrogen by weight, and they tolerate a band of about 25:1 to 40:1. Below that band there is more nitrogen than the microbes can build into their own bodies, and the surplus escapes as ammonia — which is precisely the ammonia smell described further down this page. Above it, nitrogen becomes the limiting factor and everything slows.
Treat 30:1 as a diagnostic, not a recipe. It is a weight ratio of total carbon, while you are working in loose volumes of materials with wildly different densities, and much of the carbon in woody browns is lignin that microbes cannot easily reach. Two materials with the same number on paper can behave nothing alike. So do not calculate. Add roughly two or three loose volumes of browns for each volume of dense food scraps or grass, adjust by smell and texture, and always cover fresh food with a layer of browns.
| Material | Approximate C:N | Behaves as |
|---|---|---|
| Fruit and vegetable scraps | Low, roughly 10–20:1 | Green |
| Fresh grass clippings | Low, roughly 15–25:1 | Green |
| Used coffee grounds | Around 20:1 | Green |
| Dry tree leaves | High, roughly 40–80:1 | Brown |
| Straw | High, tens to around 80:1 | Brown |
| Sawdust and small wood | Very high, in the hundreds | Brown |
- Good additions: plant trimmings, non-diseased leaves, eggshells, coffee filters, tea without plastic mesh, and small amounts of untreated sawdust.
- Add with a question first: manure, straw, hay, and grass clippings from anywhere but your own untreated garden. All four can carry herbicide residues that survive composting. See the section below before you accept a free load of any of them.
- Usually avoid in a basic pile: meat, fish, dairy, oils, pet waste, treated wood, persistent weed roots, and plants with mature seeds. Skip anything with a plastic sheen or a foil laminate, which is a test you can apply by eye.
- Use local guidance: diseased plant material and invasive species may require municipal disposal or a reliably hot process.
Feedstocks people ask about
Autumn leaves are the one surplus most households have, and the highest-value thing to do with them is often not to compost them at all but to make leaf mold: a cold, fungal, slow process that yields an excellent soil conditioner and moisture holder. A three-foot pile of whole leaves takes one to two years; shredded, kept moist, and turned occasionally, six to twelve months.
Grass clippings are usually better left on the lawn than carried to the pile. Returned clippings supply nitrogen worth one to two fertilizer applications a year, and they do not cause thatch — thatch is built from stems, shoots, and roots, not from leaf tissue, which is low in lignin and breaks down within weeks. Clippings that do go in the pile must be mixed with browns immediately, because a thick mat of fresh grass compacts, excludes air, and turns anaerobic within days.
Coffee grounds are a green, not an acidifier. The acids in coffee are water-soluble and end up in the cup; used grounds come out close to neutral, around pH 6.5 to 6.8. They will not acidify soil for blueberries.
Eggshells are harmless but close to inert at the particle size most people produce. Crushed shells can take one to five years to break down, and only shells ground to a fine powder behave like a real calcium source. Keep adding them if you like; do not count them as an amendment, and do not expect them to prevent blossom end rot, which is a calcium transport problem caused by uneven watering rather than a soil calcium shortage.
Wood ash should be capped at roughly five percent of total compost volume, because its high pH is hard on compost microorganisms. It acts as a liming agent, so soil-test before using it in the garden, keep it off alkaline soils and away from acid-loving plants, and use only clean untreated-wood ash — never charcoal briquettes, treated or painted lumber, or colored paper. Never mix ash with ammonium-containing fertilizers, which releases ammonia gas.
“Compostable” packaging generally will not break down in a backyard pile. The certification standards test performance under industrial conditions — facilities holding roughly 122 to 140°F with managed moisture and aeration — and no version of the standard tests home-compost performance. If an item is certified compostable, it belongs in a municipal organics collection that accepts it. Check first, because many programs do not.
Size, moisture, and air
A pile needs mass before it can hold heat. One cubic yard — a cube roughly three feet on each side — is the working minimum for a pile that insulates itself. Below that, the surface sheds metabolic heat faster than the microbes inside can generate it, and the pile stays cool no matter how good the mix is. A cool pile still makes compost. It simply makes it slowly, and it does not sanitize anything.
Moisture should sit around 40 to 60 percent by weight, with 50 to 60 percent the sweet spot. The familiar advice is “like a wrung-out sponge,” which is right but hard to fail against. Use a version that gives you a wrong answer in both directions:
Air matters as much as water, and it comes from structure more than from turning. Coarse browns hold pore space open; fine, wet, dense material collapses and goes anaerobic. Turning mixes the outer and inner material and restores air. It speeds decomposition but is not required every week. A managed hot batch is turned every three or four days and finishes its active phase in roughly four to eight weeks, plus curing. A passive pile with good structure can be left largely alone and will finish in three months to two years. Both produce compost; you are choosing how to spend your labor.
What “hot” actually means
A hot center signals active decomposition, not moral superiority. But heat does one thing that cool decomposition cannot: it kills things. Four separate thresholds matter, and they are not the same number.
- About 131°F (55°C) is the human-pathogen threshold, and it will also destroy most plant pathogens.
- About 145°F (63°C) is what most weed seed requires — noticeably higher. A pile that “got hot” can still be full of viable seed.
- 150 to 180°F (65 to 82°C) is what the tougher plant pathogens need, and most home piles never reach it.
- Above roughly 160°F, and certainly by 170°F, the pile begins to inhibit itself: the thermophiles generating the heat are killed off, activity crashes, and the pile cools. Turning is how you shed excess heat.
The more important point is about uniformity, not peak temperature. The regulatory standard used for treating sewage sludge and similar material is not “reach 131°F once.” For a turned windrow it is 55°C held for at least 15 days, with a minimum of five turnings during that period, so that every part of the mass passes through the hot core. A static pile has a hot center and a cold shell, and the turnings exist to move the shell into the center.
Almost no home pile meets that standard. Use this operating rule: assume a home pile does not sanitize material, and route risky material elsewhere. Weed roots and rhizomes such as bindweed, quackgrass, and Japanese knotweed should not go in a cold pile at all. Neither should plants with long-surviving diseases — downy mildew, white mold, and Fusarium among them. Clubroot is the clearest case: its resting spores survive in soil for up to twenty years, so infected brassica roots belong in the trash, not the pile, and should never be moved between gardens on tools or soil. Powdery mildew is the useful exception, since it is a parasite of living tissue and does not survive well on dead debris.
Persistent herbicides: the failure you cannot see
This is the most consequential thing in this guide. A small family of herbicides — aminopyralid, clopyralid, picloram, and aminocyclopyrachlor — is used on pasture, hay, small grains, rights-of-way, and some turf. They pass through a grazing animal's digestive tract essentially intact, survive hay curing and storage, and are not broken down by composting, hot or cold. Composting contaminated material does not fix it.
They damage sensitive plants at concentrations around one part per billion for aminopyralid and ten parts per billion for clopyralid — far below anything you could see, smell, or catch with an ordinary soil test. A gardener who follows every other rule on this page, then brings in a free load of horse manure, can produce beautiful compost that kills their tomatoes.
They arrive through four routes, in roughly this order of risk: manure from animals fed treated hay or grazed on treated pasture, including bagged and “composted” manure products; hay and straw used as mulch or as a brown; grass clippings from treated lawns or municipal collection; and bagged compost or soil mixes made from any of these.
The damage is selective in a way that makes it baffling if you do not know the cause. Tomatoes, potatoes, peppers, beans, peas, lettuce, spinach, and carrots show cupped or curled leaves, twisted stems, and fern-like or feathery new growth at the growing point, while grasses, brassicas, and corn beside them look perfect. Symptoms appear on new growth.
If the test fails, there is no home treatment that reliably destroys these residues on a useful timescale. Do not spread the material on a food garden, and do not give it away without telling the recipient. Contact your state pesticide regulatory agency, or the National Pesticide Information Center, for disposal guidance and to report suspected misuse — the product labels restrict where treated forage and the resulting manure may go, so a contaminated load may represent a label violation upstream of you.
Prevention is simply asking. Ask a manure or hay supplier what the animals were fed and whether the pasture was treated, and ask for the herbicide name rather than accepting “no chemicals.” Treat unknown-provenance manure, hay, and municipal clippings as guilty until bioassayed if they are destined for a vegetable bed.
Manure, pet waste, and food safety
Raw manure carries human pathogens, and the interval between applying it and harvesting is the control. The National Organic Program standard, which the FDA has said it does not object to growers following, is to incorporate raw manure into the soil at least 120 days before harvest where the edible portion contacts soil — leafy greens, root crops, melons, squash, low beans — and at least 90 days before harvest for everything else. Read “soil contact” broadly: anything that rain or irrigation could splash with soil counts.
In practice, manure worked into a bed in autumn for a crop harvested the following summer clears both intervals comfortably. Manure applied in spring to a bed of lettuce does not.
Aged manure is not composted manure. A pile that sat for a year without reaching and holding thermophilic temperature has lost its odor and much of its volume, but time alone is not a sanitizing process. Treat aged manure as raw.
Meat, fish, dairy, and oils are excluded from a basic pile for three separate reasons worth keeping apart: they decompose slowly at the temperatures a home pile reaches, they smell strongly as they putrefy, and they reliably attract rodents, raccoons, flies, and larger wildlife. Enclosure changes that answer more than temperature does — a sealed in-ground digester, or bokashi followed by burial, contains both the odor and the animals.
Dog and cat waste is a firmer no, and for a different reason. Toxocara canis is among the most heat-resistant pathogens in dog feces, and home composting cannot be relied on to destroy it; USDA guidance is explicit that compost containing dog waste should not be applied to food crops. Cat feces can carry Toxoplasma, whose oocysts remain viable in soil for a year or more. A separate, clearly labeled pet-waste system used only for ornamentals is defensible. Pet waste in the pile that feeds your vegetable garden is not, and the risk falls hardest on pregnant people, young children, and immunocompromised gardeners. Human waste is separately regulated in essentially every jurisdiction and is outside the scope of home composting.
Troubleshoot by symptom
It smells rotten or like sewage
The pile is too wet, compacted, or rich in nitrogen. Break up dense layers, mix in dry coarse browns, and protect it from excess rain.
It smells strongly of ammonia
There is more readily available nitrogen than the microbes can use, and the surplus is escaping as gas. Add carbon-rich browns and mix.
Nothing is changing
Check moisture first with the squeeze test. A pile of dry leaves can sit for months. Add water gradually while mixing. If the pile is moist but mostly coarse browns, add green material. If it is moist and well mixed but small, it may simply be under the mass needed to heat — it will still decompose, just slowly.
The center is hot but the edges look untouched
That is normal and it is exactly why turning matters. Move the outer shell into the center.
Flies or animals are visiting
Bury fresh scraps in the center and cover with several inches of browns. Stop adding attractive foods that the system cannot safely contain.
Seedlings are stunted and yellow in a bed I just amended
Suspect immature compost before you suspect pests or a nutrient deficiency. See the next section.
Know when compost is ready
Curing is not a formality. Immature compost is phytotoxic — ammonia, soluble salts, and organic acids suppress germination and root growth — and it immobilizes soil nitrogen as microbes finish the job in your bed rather than in the pile. The classic symptom is uniformly yellow, stunted seedlings in soil the gardener has just improved.
Finished compost is dark, crumbly, and earthy-smelling, with few recognizable ingredients other than stubborn twigs or pits. The pile will have lost up to half its original volume and will no longer generate significant heat. Two tests confirm it:
- The bag test. Seal a moist double handful in a bag for a few days at room temperature, then open it at arm's length. Mature compost smells earthy. Sour, ammoniacal, or sulfurous means it needs more curing.
- The radish test. Sow radish seed in pots of the compost. If three quarters or more germinate and grow into radishes, the compost is ready for any use. This needs one seed packet and no equipment, and it tests the thing you actually care about.
Sift only when you need a fine material for potting mixes or seed-starting components. In garden beds, coarse pieces are useful and will continue breaking down. Return unfinished material to the next pile.
Worm bins, done properly
Vermicomposting is a genuinely different system with its own tolerances, and most beginner bins fail on one of three numbers.
Use Eisenia fetida, the redworm or red wiggler. Common garden earthworms and nightcrawlers are burrowing soil-dwellers and will die in a bin. Hold the bin between 59 and 77°F (15 to 25°C) for best results, with roughly 55 to 85°F the tolerable range — this is the constraint that decides where the bin can live, and an unheated garage in a cold winter or a patio in a hot summer will both kill the population. Keep bedding wetter than a compost pile, around 60 to 85 percent moisture: wet it thoroughly, wring out the excess, then fluff it.
Feed about half the worms' body weight per day — roughly three and a half pounds of scraps per week for each pound of worms — and bury the food under the bedding rather than laying it on top. Below the optimal temperature range worms eat considerably less, which is the origin of most overfeeding failures: uneaten food ferments, the bin turns sour and anaerobic, and the worms mass at the lid or leave. If in doubt, feed less than you think and check the bin's temperature for a week before you buy worms.
Harvest castings when the bedding has become dark and crumbly. For container plants, blend vermicompost into potting medium at about 10 percent by volume; this supplies biologically active organic matter without making the mix dense or waterlogged.
Bokashi is fermentation, not composting
Bokashi is an anaerobic, lactic-acid process — pickling, essentially. Nothing is decomposed to humus inside the bucket. You layer scraps with an inoculated bran, seal the bucket, and ferment for roughly ten to fourteen days after it is full.
The output is a pre-compost, not compost. It is acidic and structurally intact, and it must be buried in soil or added to a conventional pile to finish decomposing and stabilize in pH. Put it straight around plant roots and it will damage them.
Its real advantage is that it accepts meat, dairy, cooked food, and oils — exactly the material a home aerobic pile cannot take — in an indoor, low-odor, year-round container. That makes it a genuine answer to the exclusion list above rather than a novelty.
Rodents, raccoons, and bears
Rodent resistance is a construction detail, not a bin style. A sheet of quarter-inch hardware cloth cut a few inches larger than the bin's footprint and laid underneath blocks tunneling rats and voles; the same mesh closes vents and gaps. Add a latching lid and bury fresh food in the center.
Use compost modestly
Compost is a soil conditioner that happens to feed slowly. Plant-based compost runs around 1-0.5-1 in N-P-K terms, and only about five to ten percent of its nitrogen becomes plant-available in the year you apply it. Manure-based compost is richer, releases a larger fraction immediately, and carries more salt.
For a new bed, follow Rodale Institute's practical starting rate: incorporate about 2 inches into the upper 6 to 12 inches of soil. For an established bed, top-dress with no more than 1 inch a year, then mulch. These are ceilings, not quotas; skip or reduce the next application when a soil test shows phosphorus or soluble salts already above the lab's target range.
The reason to be modest is that two things accumulate and do not readily leave. Phosphorus builds up past the point where it is agronomically useful and into the range where runoff becomes an environmental problem. Soluble salts concentrate wherever rainfall cannot flush them through — raised beds, containers, high tunnels, and arid regions — and manure-based compost is generally saltier than plant-based. Neither is reversible on a garden timescale.
So test rather than assume. If you have been applying compost or manure heavily for several years, ask your soil lab for the basic test plus soluble salts, calcium, magnesium, sodium, and ammonium, and let the result decide the next application rather than habit.
Where composting fits
Wasted food is responsible for roughly 58 percent of methane emissions from US municipal landfills, and food is about a quarter of what gets landfilled. Composting is a real improvement on that, and it is worth doing.
Use the EPA hierarchy in order: prevent surplus first, donate edible food, feed animals where permitted, and compost what remains. Composting keeps unavoidable scraps out of landfill and returns stable organic matter to soil; careful purchasing prevents the waste in the first place.
The best composting routine is not the fastest one. It is the one that fits your household, handles material safely, and keeps working after the novelty fades.
Sources and further reading
- Rodale Institute: Backyard composting basics — finished-compost checks and garden application rates.
- Rodale Institute: Vermicomposting for beginners — bin management and using castings in potting media.
- Cornell Composting: Compost chemistry — carbon-to-nitrogen targets and the ammonia-loss mechanism.
- NC State Extension Gardener Handbook, chapter 2: Composting — pile size, method, and feedstocks.
- New Mexico State University: Backyard composting — mesophilic and thermophilic ranges, pathogen and weed-seed thresholds.
- 40 CFR Part 503, Appendix B: Pathogen treatment processes — the 15-day, five-turning windrow standard.
- NC State Extension: Herbicide carryover in hay, manure, compost, and grass clippings — carryover routes, symptoms, and the bioassay protocol.
- Oregon State University Extension: Aminopyralid residues in compost — damage thresholds and affected species.
- National Pesticide Information Center: Compost contaminated with clopyralid or other herbicides — what to do next.
- US FDA: Raw manure under the FSMA produce safety rule — the 90- and 120-day intervals.
- University of Minnesota Extension: Aged manure is not composted manure.
- Iowa State University Extension: Disease-infested plant material in the compost pile.
- UF/IFAS Extension: Compost maturity test — the radish germination check.
- Oklahoma State University Extension: Vermicomposting — composting with worms — species, temperature, moisture, and feeding rate.
- Washington State University Extension: Bokashi composting.
- Oregon State University Extension: How to use compost in gardens and landscapes — application rates.
- University of Minnesota Extension: Correcting problems from too much compost and manure — phosphorus and salt accumulation.
- University of Wisconsin Horticulture: Using wood ash in the home garden.
- Oregon State University Extension: Coffee grounds and composting.
- Illinois Extension: Using eggshells in the garden and compost.
- University of Minnesota Turfgrass Science: Grass clipping myths.
- Rutgers NJAES: Backyard leaf composting — leaf mold timelines.
- University of Vermont Extension: Keeping wildlife away from your compost.
- US EPA: Wasted food scale — where composting ranks.