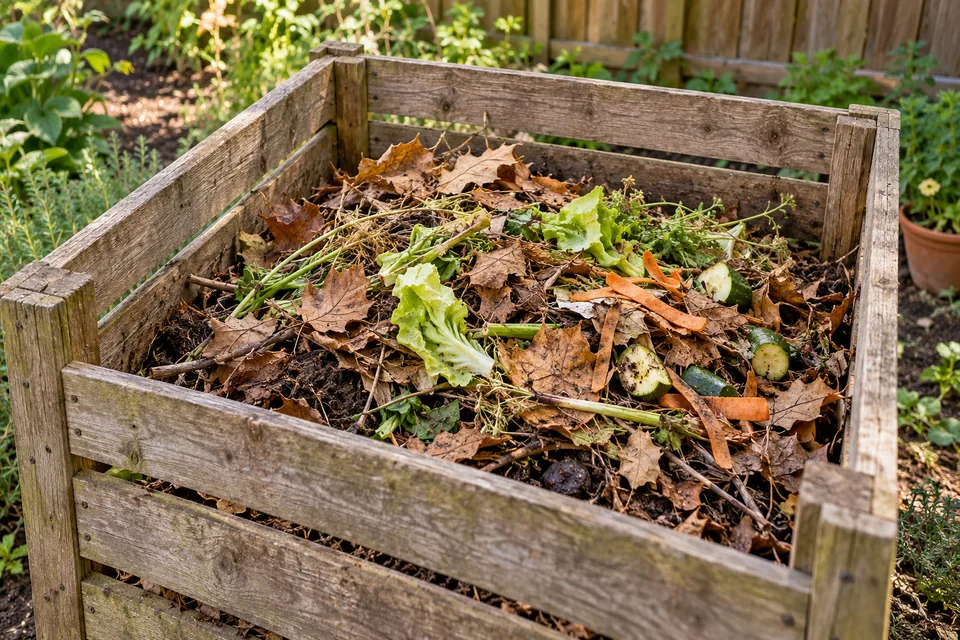
Hügelkultur—often typed hugelkultur—means mound cultivation. The method turns logs and branches into the foundation of a deep garden bed. Smaller plant material fills the spaces, while a thick cap of soil and finished compost provides an immediate root zone.
A successful bed depends on straightforward construction: untreated local wood, tightly filled air gaps, nitrogen-rich material around the woody core, a generous soil cap, and regular irrigation while the bed establishes. Build those elements correctly and the mound functions as a productive raised bed while the wood decomposes below.
Choose a safe, workable site
Place the bed in sun, within reach of a hose, and outside drainage channels, septic fields, utility corridors, and regulated fill areas. Plan to irrigate it in every climate. The soil cap is the crop's active root zone, so keep that layer evenly moist instead of relying on the buried wood.
A wildfire hazard area, within five feet of a structure. California's defensible-space framework defines Zone 0 as the first five feet from a building, and it is an ember-resistant zone: no combustible bark or mulch, use gravel, pavers, or concrete instead. A wood-cored, straw-mulched mound is precisely what that zone excludes. The same applies while you are building — stockpiled firewood and lumber belong at least thirty feet from any structure or in a non-combustible enclosure. Requirements are being adopted on different timetables, so check your local fire district.
Within about twelve inches of a house foundation. That band is the treated-soil zone for termite control. Digging in it or covering it with new soil lets termites bridge over the treatment. Siding should also sit at least six inches above the soil line, and a bed that raises grade works directly against that.
Over a septic field or a leach line, in a drainage channel, over buried utilities, or on a site where the addition of fill is regulated. Floodplain rules, wetland setbacks, and HOA restrictions all bear on a two- to three-foot mound of imported material.
A wet, poorly drained site. Correct drainage before construction. The bed's height improves drainage; the woody core does not repair a saturated site.
Understand the three working layers
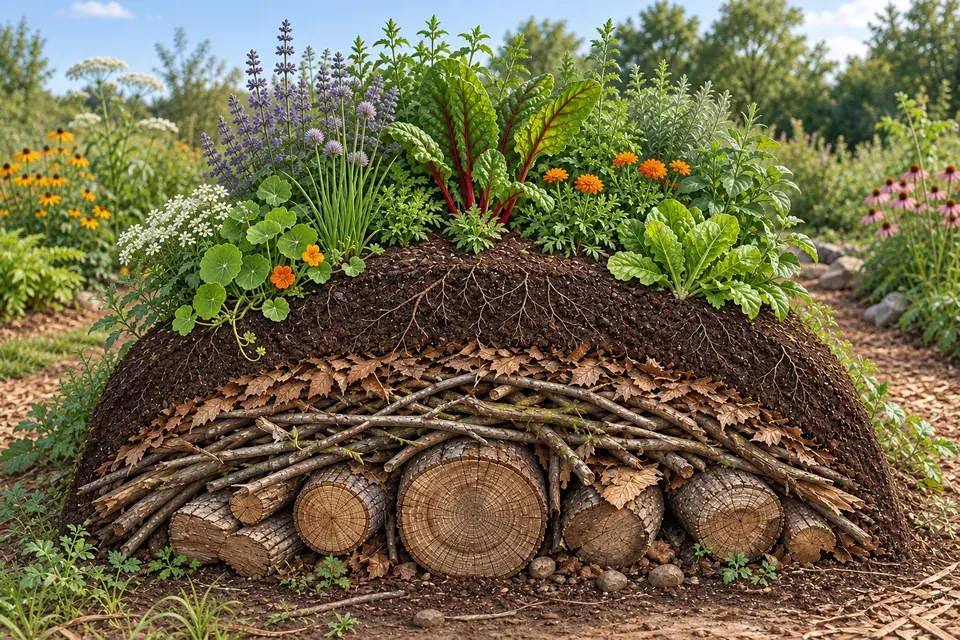
A reliable hügelkultur bed has three distinct zones. The woody core contains logs, thick branches, and smaller sticks. The fill layer contains leaves, green plant trimmings, aged manure, and other compostable material packed between the wood. The growing layer is a real depth of topsoil blended with finished compost.
Keep those zones distinct. The largest wood belongs at the bottom, the finest organic matter belongs around it, and the best soil belongs where roots will grow during the first seasons. This arrangement prevents large air pockets and gives new plants consistent access to moisture and nutrients from the day they are planted.
The boundary between the wood and the soil above it is the part that matters most, and the next section explains why.
Nitrogen, wood, and why burial matters
The most common worry about this method is that buried wood will rob the bed of nitrogen. The concern is real, but it applies far more narrowly than people assume, and understanding where it applies tells you exactly how to build.
Microbes decomposing wood need nitrogen to build their own bodies. Wood is extraordinarily carbon-rich — sawdust runs somewhere around 200:1 to 750:1 carbon to nitrogen, and corrugated cardboard around 600:1, against a decomposition optimum of roughly 20:1 to 40:1. Immobilization rises sharply once a substrate exceeds about 30:1. So when high-carbon wood is mixed into soil, the resulting microbial population boom draws plant-available nitrogen down and crops go hungry.
The critical distinction is that surface-applied and buried wood behave differently from incorporated wood. Where wood sits against soil rather than being blended through it, the nitrogen-depleted zone is thin and confined to the interface. It is deep enough to suppress weed-seed germination right at that boundary, and it has no effect on established roots below or above it. Field trials in vegetable production found yields improved most when wood chips were top-dressed after planting rather than plowed under — the same principle from the other direction.
That is the whole answer for a hügel bed. Wood buried beneath a genuine soil cap, not mixed through it, is largely fine. Piece size matters too, since it drives surface area: large-diameter logs break down slowly and expose little interface, while branches and small wood decay sooner and interact more.
So, in order of least disruption:
- Keep the cap deep enough that annual crop roots stay above the wood-and-soil boundary.
- Never mix chips, sawdust, or small wood into the growing layer itself.
- Place nitrogen-rich material — grass clippings, aged manure, compost — into the gaps at the wood-and-soil boundary during construction, which is what the standard layering sequence is for.
- Then observe. Side-dress nitrogen in the first season only if crops actually yellow. Do not pre-emptively fertilize against a problem you may not have.
Plan the bed before moving wood
For a first build, make the bed about 4 feet wide, 6 to 8 feet long, and 2 to 3 feet high after covering. That width keeps the center within reach from both sides. Scale the length and height to the site and the amount of clean wood available.
Leave a clear path around the entire bed and confirm the foundation distance, fire zone, septic, utility, and drainage checks in the siting section.
Orientation depends on your goal. If the bed is purely for production, run the long side so both faces receive useful light. If you want the bed to capture runoff — one of its better-supported uses — run the long axis across the slope, on contour. A mound built parallel to the direction of flow cannot intercept it.
Choose wood you can trust
Use untreated wood from a known source. Partly decayed logs absorb water readily and fit together well, while sound logs provide a longer-lasting core. Collect a full range of particle sizes before construction begins: logs for the base, branches and twigs for the middle, and leaves or pesticide-free plant residues for the gaps.
Species and decay rate
Decomposition is the engine of this method, so use wood that rots readily. Hardwoods generally decompose faster than conifers, and high lignin content slows decay. Downed woody debris on eastern US forest floors had average decay half-lives of about ten years for hardwoods and eighteen for conifers, with total residence measured in decades. A log core is a long-lived part of the bed, not an immediate fertilizer source.
Some species barely decay at all. USDA Forest Products Laboratory durability ratings put black locust as very resistant, with cedar, osage-orange, and old-growth redwood resistant; cedar and oak heartwood are cited as lasting twenty years or more even above ground. These are exactly the right woods for a bed frame and exactly the wrong woods for a core. Fill a mound with cedar or black locust and you have built a long-term structural void.
Treated, painted, and engineered wood
Keep all of it out. Chromated copper arsenate (CCA) has not been available for residential use since the phase-out announced in February 2002, but older decks, landscape timbers, and playground structures may still be CCA. Current residential preservatives — copper azole, micronized copper azole, and alkaline copper quaternary — contain copper but no arsenic or chromium. Oregon State measured soil copper around ground-contact copper-azole raised bed lumber and found an increase only within about an inch of the bed edge, with no increase in copper in the plants grown there. That is reassuring for a frame; it says nothing about burying treated wood inside the growing area, which you should not do.
Creosote has no EPA-approved residential uses, including landscape timbers and garden borders, and is treated as a probable carcinogen — so railroad ties are out. Note a regulatory subtlety: the federal restriction covers treating and selling such wood for residential use, not the reuse of ties someone already owns, so state, county, or city rules are what apply to reuse. Also exclude painted and stained wood, glued and engineered products, and pallets unless you can read a heat-treatment stamp.
Black walnut
Compost black-walnut leaves, bark, and chips for at least six months before using them. Use another wood for beds planted with tomatoes and peppers. This conservative handling rule is simple, gives the material time to break down, and avoids a preventable crop problem.
Diseased wood and wood you should not move
This is where a hügel bed can create a genuine problem, because a mound of imported wood is a large, undisturbed reservoir.
- Oak wilt. Mycelial mats form under the bark of oaks killed by the disease in the previous year. They smell sweet, attract sap beetles, and the beetles carry spores to fresh wounds on living oaks. Wood that is fully dry or completely debarked cannot support the fungus and is safe. Otherwise, cover it entirely with an intact tarp, bury the tarp edges so beetles cannot get in, and leave it at least a year until the wood is dry and the bark is loose. After that it is fine for a core.
- Emerald ash borer. The federal quarantine ended in January 2021, but state quarantines and other federal, tribal, and private firewood rules remain in force. Deregulation at the federal level does not mean wood can move freely.
- Spotted lanternfly. Egg masses look like a splash of dried mud, are laid from late summer into early winter, and hold roughly thirty to fifty eggs each. They stick to any surface, woody debris included. Inside a quarantine area, material being moved must be inspected, and businesses producing mulch or firewood need a compliance agreement with the state agriculture department — relevant if you are sourcing bulk wood from a tree service.
The general rule is the firewood rule: source wood locally rather than hauling it. Distance thresholds vary by state, so check your state's forestry or agriculture page rather than assuming a number.
Build the bed in seven steps
- Mark and clear the footprint. Remove perennial weeds and save any clean turf for the fill layer. Excavate a trench — one to two feet deep is the range extension guidance gives, and sinking the base six to twelve inches lowers the finished height and helps the bed capture runoff from the surrounding ground.
- Lay the log foundation. Place the largest logs lengthwise inside the footprint. Keep them stable and close together, with the thickest pieces in the center.
- Add branches and twigs. Stack progressively smaller wood over the logs. Push branches into every large gap to create a dense, interlocking core.
- Pack in plant material. Cover the wood with damp leaves, garden trimmings, saved turf placed grass-side down, and aged manure. Alternate dry carbon-rich material with thin nitrogen-rich layers, and work the nitrogen-rich material into the gaps at the top of the wood, where the interface will be.
- Soak the core. Water slowly until the leaves and small wood are thoroughly damp. This settles the layers and starts the bed with an even moisture reserve.
- Add the growing layer. Cover the mound with topsoil and finished compost to the depth your crops need — see below. Fill every hollow, round the crown, and firm the surface lightly with the back of a rake.
- Plant and mulch immediately. Install transplants or sow fast-germinating seed, then cover exposed soil with 2 to 3 inches of loose straw, shredded leaves, or another clean organic mulch.
How deep the growing layer needs to be
The cap is the part of the bed that has to work immediately, and its depth should follow the crops rather than a fixed number. Raised bed guidance for beds over a hard surface gives a useful scale: a minimum of about 8 inches for leafy greens, beans, and cucumbers, and 12 to 24 inches for peppers, tomatoes, and squash. General raised-bed recommendations cluster around 6 to 12 inches, with roughly 8 inches adequate for most vegetables.
Crop rooting depth is the reason. Lettuce, beets, and green beans draw most of their water from the top foot of soil or less; corn, tomatoes, asparagus, and rhubarb work the top two feet. Salad greens can be produced in as little as three inches of medium, which is why they are the safe crop over a thin cap in the first season.
Two things go wrong when the cap is too shallow. Roots reach the wood-and-soil interface, where the nitrogen-depleted zone sits. And settling exposes wood at the surface within a season or two, leaving plants in a thin, uneven layer. Build the cap deeper than you think and keep spare soil-compost blend on hand.
Plant each zone deliberately
The crown is warmest and drains fastest. Use it for upright crops and herbs that tolerate drier soil, such as tomatoes, peppers, rosemary, thyme, or sage where the climate suits them — provided the cap is deep enough for them. The sloping sides suit sprawling and quick-covering plants such as squash, cucumbers, bush beans, nasturtiums, chard, and low flowers. The lower edges stay moist longest: plant lettuces, parsley, celery, and other moisture-loving crops there.
One thing not to plant: because these mounds settle and eventually collapse, they are a poor place for fruit trees or fruiting shrubs, which need a stable soil line for decades. Keep the bed for annuals and short-lived perennials.
In the first season, favor shallow-rooted crops — greens, bush beans, squash — while the cap settles and the interface stabilizes. Save deep feeders for later years once you have topped the bed up and know where the soil line has landed.
Plant densely enough to establish cover, but leave each crop its normal mature spacing. Press seed into small level pockets rather than scattering it down a steep face, and water every transplant individually at planting time.
Manage the first growing season
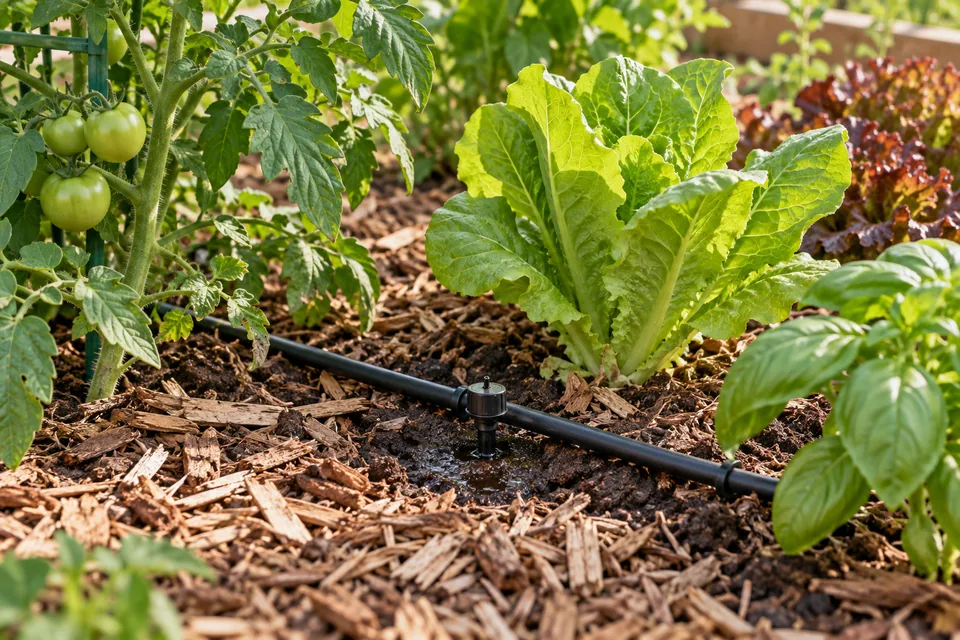
Water the root zone whenever the upper 2 to 3 inches of soil become dry. Irrigate the bed as deliberately as you would any new raised bed, in every climate — this is the point at which the method's reputation most often misleads people. New wood absorbs a great deal of water during the first season, and a bed that is dry at the root zone does not care what is happening two feet below it.
After heavy rain, inspect the mound for channels, exposed wood, and sliding soil. Fill depressions immediately with topsoil and compost, reset loose plants, and restore the mulch. Steep faces erode; these quick repairs lock the surface into place while roots spread through it.
Feed demanding annual crops with finished compost or the same balanced fertilizer you use elsewhere in the garden. The buried wood belongs below the root zone; it does not replace normal crop nutrition during establishment.
The framed version, and the perched water table
A tall framed raised bed can use a wood core without the sloping profile, and extension raised-bed guidance describes the practice — putting logs and sticks in the bottom of a deep bed to fill space — by name. Use a frame at least 24 inches deep, reserve the top of it for the growing depth your crops need (8 inches minimum for greens, more for fruiting crops), and fill below that with tightly arranged logs, branches, leaves, and green plant material. Water each layer as you fill, especially around the logs.
Protect the growing layer. Fine soil over a coarse layer can hold water at the boundary instead of draining freely, so never use the wood core as a drainage layer. Start on a well-drained site, pack the core tightly, and reserve enough depth for the soil cap. The bed's elevation—not the buried wood—provides the drainage advantage.
Plan for settling. The surface drops as the organic material decomposes. Keep a soil-and-compost blend available and top up depressions every spring until the bed stabilizes.
What lives in a buried brush pile
A buried wood core creates sheltered habitat, so exclude pests during construction and keep the perimeter visible.
Voles. Extension guidance names piles of dead branches and brush as vole habitat and recommends removing, chipping, or hauling them away. If voles are a problem where you garden, exclude them at construction: quarter-inch hardware cloth, standing about 12 inches above ground and buried 6 to 10 inches below it. Larger mesh does not work. Then manage the perimeter — keep grass mowed short around the bed and maintain a vegetation-free buffer with no more than an inch or two of mulch immediately around it. That qualifies the mulching advice above: mulch the bed surface, but do not run deep mulch right out into the surrounding ground, and avoid weed-barrier fabric, which encourages tunneling.
Termites. Follow the foundation clearances in the siting section. Mulch within a foot of a foundation should be a thin layer under two inches so the soil beneath can dry; mulch deeper than four to six inches obscures the inspection space along the wall and helps termites by holding moisture and moderating temperature. A two- to three-foot mound against a house is that failure mode at its extreme.
Ants, snakes, and other visitors follow from the same logic: rodent habitat attracts what eats rodents. None of this makes the method unworkable — it makes siting and exclusion worth doing properly at the start, when it is easy.
Maintain the bed year by year
Each spring, fill settled areas with topsoil and finished compost, restore the mound's smooth profile, and add fresh mulch after planting. During the growing season, keep the surface covered and water according to root-zone moisture. In autumn, leave healthy roots in place, remove diseased plants, and protect the soil with leaves or another clean mulch.
As the woody core decomposes, the bed becomes lower and denser. Continue topping it up rather than rebuilding it. Mark the soil line against a stake at the end of the first season and check it each spring. Once the annual drop becomes small, the core has stabilized and the bed can be maintained like any other deep raised bed.
Keep the surface covered and grow living roots whenever the season permits. These practices protect aggregates, feed soil organisms, and slow erosion—the same soil-health principles Rodale Institute uses in its long-running field systems.
Sources and further reading
- Washington State University Extension: Hügelkultur — what is it, and should it be used in home gardens? — the principal critical review, and the source for the absence of peer-reviewed evidence.
- Oklahoma State University Extension: Creating a hügelkultur for gardening and stormwater management — the counter-position, plus trench depth and on-contour siting.
- University of Arizona Cooperative Extension: Hügelkultur — irrigation still necessary in a desert climate.
- Clemson Cooperative Extension: Hügelkultur gardening — layering sequence and the effect of wood piece size.
- Washington State University Extension: Wood chip mulch — surface versus incorporated wood and the thin interface zone.
- Colorado State University Extension, CMG GardenNotes #245 — nitrogen immobilization mechanism.
- Cornell Waste Management Institute: Carbon-to-nitrogen ratios of common materials.
- USDA Forest Service: Residence time and decay of downed woody debris in eastern US forests — decay half-lives by wood type.
- USDA Forest Products Laboratory, Wood Handbook chapter 14: Biodeterioration of wood — heartwood decay-resistance classes.
- National Pesticide Information Center: Treated wood — CCA phase-out, current preservatives, and creosote restrictions.
- Oregon State University Extension: Pressure-treated wood in raised bed construction — measured copper movement in soil and plants.
- University of Maryland Extension: Safety of materials used in building raised beds.
- Washington State University Extension: Do black walnut trees have allelopathic effects on other plants? — the juglone evidence review.
- Iowa State University Extension: Can I use woodchips from walnut as mulch?
- University of Minnesota Extension: Oak wilt in Minnesota — mycelial mats and the tarping protocol.
- Don't Move Firewood: Federal deregulation of emerald ash borer — why state rules still apply.
- Penn State Extension: Complying with spotted lanternfly quarantine regulations.
- NC State Extension: Termites — preventing problems in existing homes — the twelve-inch treated-soil zone and siding clearance.
- UF/IFAS Extension: Mulch and termites — mulch depth near foundations.
- University of Missouri Extension: Controlling vole damage — hardware cloth specifications and perimeter management.
- California Board of Forestry and Fire Protection: Defensible space zones 0, 1 and 2.
- Washington State University Extension: Container drainage and the perched water table.
- University of Maryland Extension: Growing vegetables in raised beds — soil depth by crop.
- University of Maryland Extension: Soil to fill raised beds — buried wood cores and ongoing settling.
- Nebraska Extension: Trench composting.
- Oregon State University Extension: Sheet mulching with cardboard.
- Rodale Institute: Soil health — keeping soil covered, maintaining living roots, and reducing erosion.