A yellow leaf is the end of a process, not the start. Diagnose it from the leaf's position and pattern, the moisture and condition of the roots, the available light, and the change that preceded the symptom.
This guide works from the cheapest evidence to the most expensive: things you can rule out by looking, then by touching the soil, then by lifting the plant out of its pot. Nutrition comes last, because it is the hypothesis people reach for first and confirm least often.
Rule out normal first
Two entirely normal processes account for a large share of the yellow leaves people worry about.
Old leaves die. A healthy plant sheds its lowest, oldest leaves as it grows. If one or two leaves at the very bottom yellow evenly and drop while everything above them looks good and new growth continues, that is senescence and it needs no response.
New plants drop leaves. A plant grown in a bright nursery and moved into a living room has to rebuild itself for less light. When the food used by respiration exceeds what photosynthesis can produce, the plant stops growing and sheds leaves until it reaches a balance. It then grows "shade leaves" — structurally different from sun leaves and better at using dim light.
The same thing happens to plants that come back indoors after a summer outside. That process is expected, but you can blunt it. Start a newly bought plant in the brightest spot you have and move it gradually to its permanent, darker position over four to eight weeks. During the transition, lengthen the interval between waterings and cut fertilizer to about half the normal rate. A plant that is not growing does not need feeding at full strength.
Read the pattern before you act
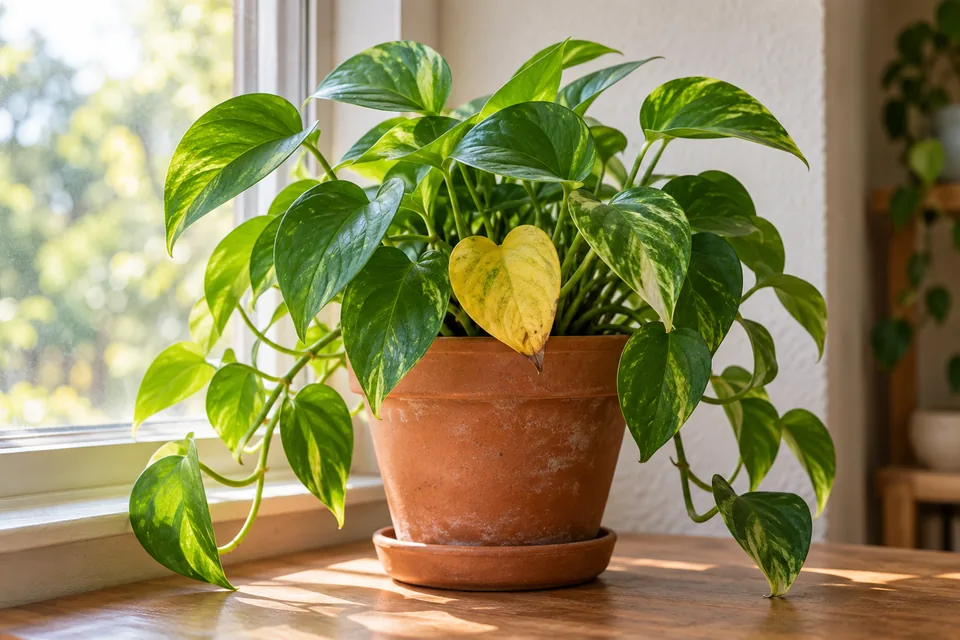
Where the yellow appears is more informative than how much of it there is. Look at three things.
Which leaves. Oldest and lowest first, or newest growth first? This single observation separates two whole families of cause, and it is the basis of the nutrition section below.
What shape. Uniform yellowing across the whole leaf, yellow between the veins with the veins staying green, yellowing that starts at the margins and works inward, or discrete spots and stippling. Interveinal yellowing points at a nutrient or pH problem. Marginal browning and scorch points at salts, water quality, or drying. Fine stippling points at pests.
How fast. A plant that yellows over a weekend is telling you about a root or temperature event. One that fades over two months is telling you about light, feeding, or a slow root decline.
Test water and air at the root zone
Overwatering is the most common cause and the most commonly misunderstood, because the damage is not done by water. It is done by the absence of oxygen. Roots need to breathe; when water fills every pore for long enough, they suffocate, and opportunistic rot organisms follow into the dying tissue. That is why "overwatered" and "root rot" describe the same event at two stages.
The signature that separates it from underwatering is worth memorizing: the plant is wilted even though the soil is wet. A thirsty plant wilts in dry soil and recovers within hours of watering. A plant with damaged roots wilts in wet soil and does not recover, because the roots can no longer move water regardless of how much is available.
Overwatering typically shows as yellowing or browning of the lower and inner leaves first, along with leaf drop, general wilting, and often fungus gnats. Check moisture by weight and by finger, not by schedule: lift the pot, and push a finger or a wooden skewer two inches in. Water when the top of the medium has dried, and match the interval to the season — the same plant in the same window needs far less water in January than in June.
Then look for hidden water. Several common setups drown plants invisibly:
- A nursery pot sitting inside a decorative cachepot or foil sleeve that collects water you never see.
- A saucer left full after watering.
- A pot with no drainage hole at all.
- A pot much larger than the root ball, so most of the medium stays wet because no roots are drinking from it.
- A layer of gravel in the bottom "for drainage." It does not drain. Water does not readily cross the boundary between fine medium and coarse gravel, so it perches above the layer — you have simply raised the wet zone and reduced the depth of usable medium.
Fungus gnats deserve their own note: they are a moisture indicator, not usually the cause of decline. Their larvae live in persistently wet organic medium. If you have them, the medium is staying wet too long, and fixing that fixes both problems.
The opposite failure looks different. Peat-based mixes that dry out completely become hydrophobic and shed water down the sides of the root ball, so the plant stays dry no matter how much you pour through. If water runs straight out within a second or two, bottom-water instead: stand the pot in a few inches of water for twenty to thirty minutes until the surface darkens, then drain it fully.
Inspect the roots
If the evidence points below the soil line, look. Slide the plant out of its pot — most will come out cleanly if you support the base and tip it — and examine the outside of the root ball.
Healthy roots are white, entirely or at least beneath their outer covering, and firm. Rotted roots are brown to black, soft, and mushy, and the tips discolor first. There is a diagnostic worth knowing: on a rotted root, the outer layer pulls away easily from the core, leaving a fine hair-like thread behind. Healthy roots do not do that.
Smell is corroborating evidence — sour or sulfurous rather than earthy indicates anaerobic conditions.
If a minority of roots are affected, trim the dead tissue away with clean shears, repot into fresh medium in a container only slightly larger than the remaining root ball, and water sparingly until new growth appears. Do not fertilize a plant with damaged roots; it cannot use the nutrients and the added salts make things worse. If most of the root system is gone, the plant is unlikely to recover, and a cutting from healthy top growth is usually the better bet.
While the plant is out, check whether it is root-bound — roots circling the inside of the pot with little medium left. Move up one pot size, not three; the repotting guide walks through each step. An oversized pot holds a large volume of medium that no root is drinking from, which puts you back at the start of this section.
Put numbers on the light
"Bright indirect light" is a phrase, not a measurement, and human eyes adapt so well that we consistently overestimate indoor brightness. Light intensity indoors is often described in foot-candles, and the working bands are:
| Category | Light at leaf level | Typical exposure |
|---|---|---|
| Low light | 25–100 fc | North-facing window or a lit room |
| Medium-bright light | 100–500 fc | East- or west-facing window |
| High light | 500–1,000 fc | South- or some west-facing windows |
| Direct indoor sun | More than 1,000 fc | Four to six hours in a sunroom or unshaded south-facing window |
Distance from the glass matters more than most people expect, and so does the time of year. Low light is what you find within about two feet of a north-facing window from October through March, and two to six feet back from — or a foot to the side of — a south-facing window from April through September. Beyond eight to ten feet from any window, growing plants becomes difficult regardless of how bright the room feels.
This is why the same windowsill is effectively a different location in January than in June, and why a plant that was fine all summer starts fading in autumn without anything having "happened." If the yellowing began as the days shortened, and it is spread over the whole plant rather than following a pattern, suspect light before anything else — and reduce watering and feeding to match the slower growth rather than compensating with more of both.
Check for salt buildup, and leach the pot
Every time you fertilize, you add dissolved salts. Water evaporates; the salts stay. Over months in a container with limited flushing, they concentrate.
The result is a set of symptoms that mimics several other problems: marginal leaf browning and scorch, chlorosis, wilting, stunting, loss of vigor, and root death. The mechanism is osmotic. As the salt concentration in the medium rises, the plant has to work harder to take up water at all; at high enough levels water is pulled out of the root tips and they die. Accumulated deposits also shift the pH of the medium and interfere with nutrient uptake.
Look for a white or yellowish crust on the medium surface, around the drainage hole, or on the outside of a clay pot. That is the visible form of the problem.
The fix is mechanical. Leach the pot: pour clear water equal to at least twice the volume of the container slowly through the medium, letting it drain away completely, and keep the water running through to carry the salts out. Do this every four to six months as routine maintenance, and any time you see crusting. If the crust is heavy, scrape off the top layer of medium first and replace it with fresh. Do not leach into a saucer that then sits under the pot — the point is to remove the salts from the system.
Consider what is in your water
Tap water composition varies enormously by locality, and a few common houseplants are genuinely sensitive to what is in it.
Fluoride is added to many municipal supplies, and spider plants and dracaenas — including the corn plant — are notably sensitive. The symptom is yellowing at the tips or margins of the leaf, progressing to dead, scorched areas. Perlite in the potting mix is also a fluoride source and is worth avoiding for these species. Keeping the medium around pH 6.0 to 6.5 limits the injury, and filtered or collected rainwater avoids the exposure.
Brown tips alone do not identify a water-quality problem. Low humidity, a medium that dries too far, and salt accumulation produce the same symptom. Check those causes first unless the plant is a fluoride-sensitive spider plant or dracaena.
One more caution: do not water houseplants with artificially softened water. Ion-exchange softeners replace calcium and magnesium with sodium, which is exactly what you do not want accumulating in a container.
Find the pest before you treat
Sap-feeding pests cause yellowing by removing cell contents. Each leaves different evidence, so identify before you spray. Take the plant to good light, use a hand lens if you have one, and check leaf undersides and the joints where leaf stalks meet stems — the places people never look.
- Spider mites. Adult females are under 1/20 inch and look like tiny moving dots. The distinguishing sign is fine silk webbing on the leaves, which separates them from aphids and thrips. Damage shows first as fine pale stippling that reads as a dusty or bronzed cast before it reads as yellow. Thrive in warm, dry indoor air.
- Mealybugs. Small, oval, whitish insects that leave cottony or waxy material, typically along leaf veins and in leaf axils. Cause stunted growth, yellowing, and wilting.
- Scale. Immobile brown or tan bumps on stems and leaf undersides that can be scraped off with a fingernail. Infested leaves yellow and drop. Often first noticed as sticky honeydew on the leaves or floor below.
- Thrips. Under 1.5 mm, elongated, brown, black, pale, or yellow. Cause silvery scarring and distorted new growth. Tapping a leaf over white paper makes them visible as moving specks.
- Aphids. Clustered on soft new growth; usually the easiest to see and the easiest to wash off.
Work from least disruptive upward. Isolate the affected plant from the rest of your collection first. Wipe or wash the foliage — a shower and a soft cloth remove a surprising share of any of these. Prune out heavily infested growth. Only then consider insecticidal soap or horticultural oil, and note that coverage is the entire game: these products work on contact, so the undersides of leaves must be wetted thoroughly, and a repeat application is usually necessary as eggs hatch. Use only products labeled for indoor or houseplant use, and follow the label.
Treat nutrition as a last, specific hypothesis
Nutrient deficiency is where most people start and where the evidence usually is not. A plant in a container with a reasonable feeding schedule and a healthy root system is rarely short of a nutrient — and a plant with damaged roots cannot take nutrients up no matter how much you supply, so feeding it makes things worse.
When you do consider it, there is one rule that turns a guess into a diagnosis: mobility. Some nutrients can be moved within the plant, and some cannot.
| Mobility | Nutrients | Symptoms appear first on |
|---|---|---|
| Mobile | Nitrogen, phosphorus, potassium, magnesium, molybdenum, chlorine | Older, lower leaves — the plant strips them to supply new growth |
| Immobile | Iron, manganese, calcium, sulfur, boron, copper, nickel | New growth at the tips — old leaves stay green |
From there the visual signature narrows it further:
- Nitrogen: uniform pale green to yellow on the oldest leaves, with stunted growth overall. The chlorosis begins at the tip and moves along the midrib.
- Potassium: also oldest leaves, but the yellowing begins at the tip and moves along the margins rather than the midrib. That edge-versus-midrib distinction is how you separate the two.
- Magnesium: interveinal yellowing — green veins on a yellow background — on older leaves, because magnesium is mobile.
- Iron: the same interveinal pattern but on the newest leaves, with a sharp network of dark green veins. In severe cases the whole leaf goes yellow to nearly white and the margins scorch.
- Manganese: resembles iron but tends to add small dead specks.
- Sulfur: more uniform yellowing of young leaves without strong vein contrast.
Test the potting-medium pH before adding iron. Iron chlorosis is usually an availability problem, not a supply problem: above about pH 7.0, iron becomes chemically unavailable even when it is present. If long-term use of hard, alkaline water has raised the medium's pH, repot into fresh medium and correct the water source instead of repeatedly adding iron.
A ten-minute diagnostic sequence
Run these in order. Most problems resolve within the first four steps.
- Is this normal? One or two lowest leaves on a growing plant, or leaf drop within two months of bringing it home. If yes, stop.
- What changed in the last month? Move, repot, feed, season, heating, travel. Write it down.
- Lift the pot and feel the medium. Heavy and wet with a wilting plant means root damage. Light and dry with water running straight through means hydrophobic medium.
- Check for hidden water. Cachepot, sleeve, full saucer, no drainage hole, oversized pot, gravel layer.
- Look at the pattern. Old leaves or new? Uniform, interveinal, marginal, or stippled?
- Turn leaves over and look for pests, especially in the axils and along the veins.
- Look for salt crust on the surface, the rim, and the drainage hole. Leach if present.
- Measure or map the light — intensity at leaf level, direction, distance from glass, and time of year.
- Slide the plant out and inspect the roots if the first eight steps have not explained it.
- Only now consider nutrition, using the mobility rule to name a specific candidate.
Whatever you conclude, change one thing at a time and give the plant several weeks to answer. Yellow leaves do not turn green again — that tissue is finished — so you are watching new growth and the leaves adjacent to the damage, not waiting for a recovery that cannot happen. Judge the intervention by what the plant does next, not by what it looks like now.
Sources and further reading
- UC Statewide IPM Program: Houseplant problems — pest identification and least-toxic management indoors.
- UC Statewide IPM Program: Spider mites — size, webbing, and coverage requirements for soap and oil.
- University of Wisconsin Horticulture: Root rots on houseplants — the wilted-but-wet signature and root appearance.
- University of Maryland Extension: Root rots of indoor plants.
- University of Maryland Extension: Symptoms of overwatered indoor plants.
- University of Florida Emerging Pathogens Institute: Diagnosing houseplants 101 — oxygen starvation and hidden water in decorative pots.
- Clemson Cooperative Extension: Houseplant diseases and disorders.
- University of Missouri Extension: Lighting indoor houseplants — foot-candle categories and window-distance rules.
- University of Maryland Extension: Lighting for indoor plants — measuring light and the limits of phone apps.
- University of Missouri IPM: Houseplant acclimatization — leaf drop, shade leaves, and the four-to-eight-week transition.
- University of Maryland Extension: Fertilizer toxicity and high soluble salts in indoor plants.
- University of Maryland Extension: Mineral and fertilizer salt deposits on indoor plants.
- UC Agriculture and Natural Resources: Leach your houseplants to avoid salt problems — the leaching procedure.
- Oregon State University Extension: Soluble salts damaging to houseplants.
- Michigan State University Extension: Fluoride toxicity in plants irrigated with city water.
- University of Wisconsin Horticulture: Spider plant, Chlorophytum comosum — the several causes of brown tips.
- Cornell University: Diagnosing plant nutrient deficiencies using leaf symptoms — mobile and immobile nutrients.
- University of Missouri IPM: Diagnosing nutrient deficiencies — the nitrogen midrib versus potassium margin distinction.
- Iowa State University Extension: Identifying iron deficiency.
- Utah State University Extension: What is iron chlorosis and what causes it? — pH lockout and deficiency look-alikes.
- Illinois Extension: Chlorosis.
- University of Maryland Extension: Winter indoor plant problems.